Wednesday, June 9, 2010

Drafting: Moving Darts

This tutorial picks up where my midriff yoke tutorial leaves off: In the images you see here, I've already removed the lower portion of the bodice to form the yoke.  The next step, before we actually create the surplice neckline, will be to combine and eliminate some of the darts in the bodice.  So in this tutorial, I'll show you how to move a dart using the slash-and-spread method.  Although I'm working on my brunch dress bodice here, the steps I'll describe apply to many other situations where you would move or combine darts.


Combining Two Darts into One
 
For a bodice of this style, it doesn't make much sense to have a bust dart, so we need to combine the bust dart with the waist-fitting dart.  When we're done, the bodice front will have one single dart that accomplishes the same fitting as the two darts we started with.

First, cut through the center of the bust dart, cutting almost to but not through the bust point.  Do the same for the waist dart.  The bottom corner of the bodice piece will now be connected only by a tiny paper hinge at the bust point, and should be able to pivot freely.  (If it doesn't, you need to cut further.)


Pivot the piece so that the edges of the bust dart meet at the side seam, and tape it closed, making sure your paper lies flat with no wrinkles or hitches.


The edges of your remaining dart will be slightly uneven, so trace straight lines from the bottom corners to the bust point to form new, straight dart legs.  (As a rule of thumb, when a bodice has only one dart, it extends all the way to the bust point.  When it has two darts, the points of those darts fall somewhere in the outer third of the bust circle.)
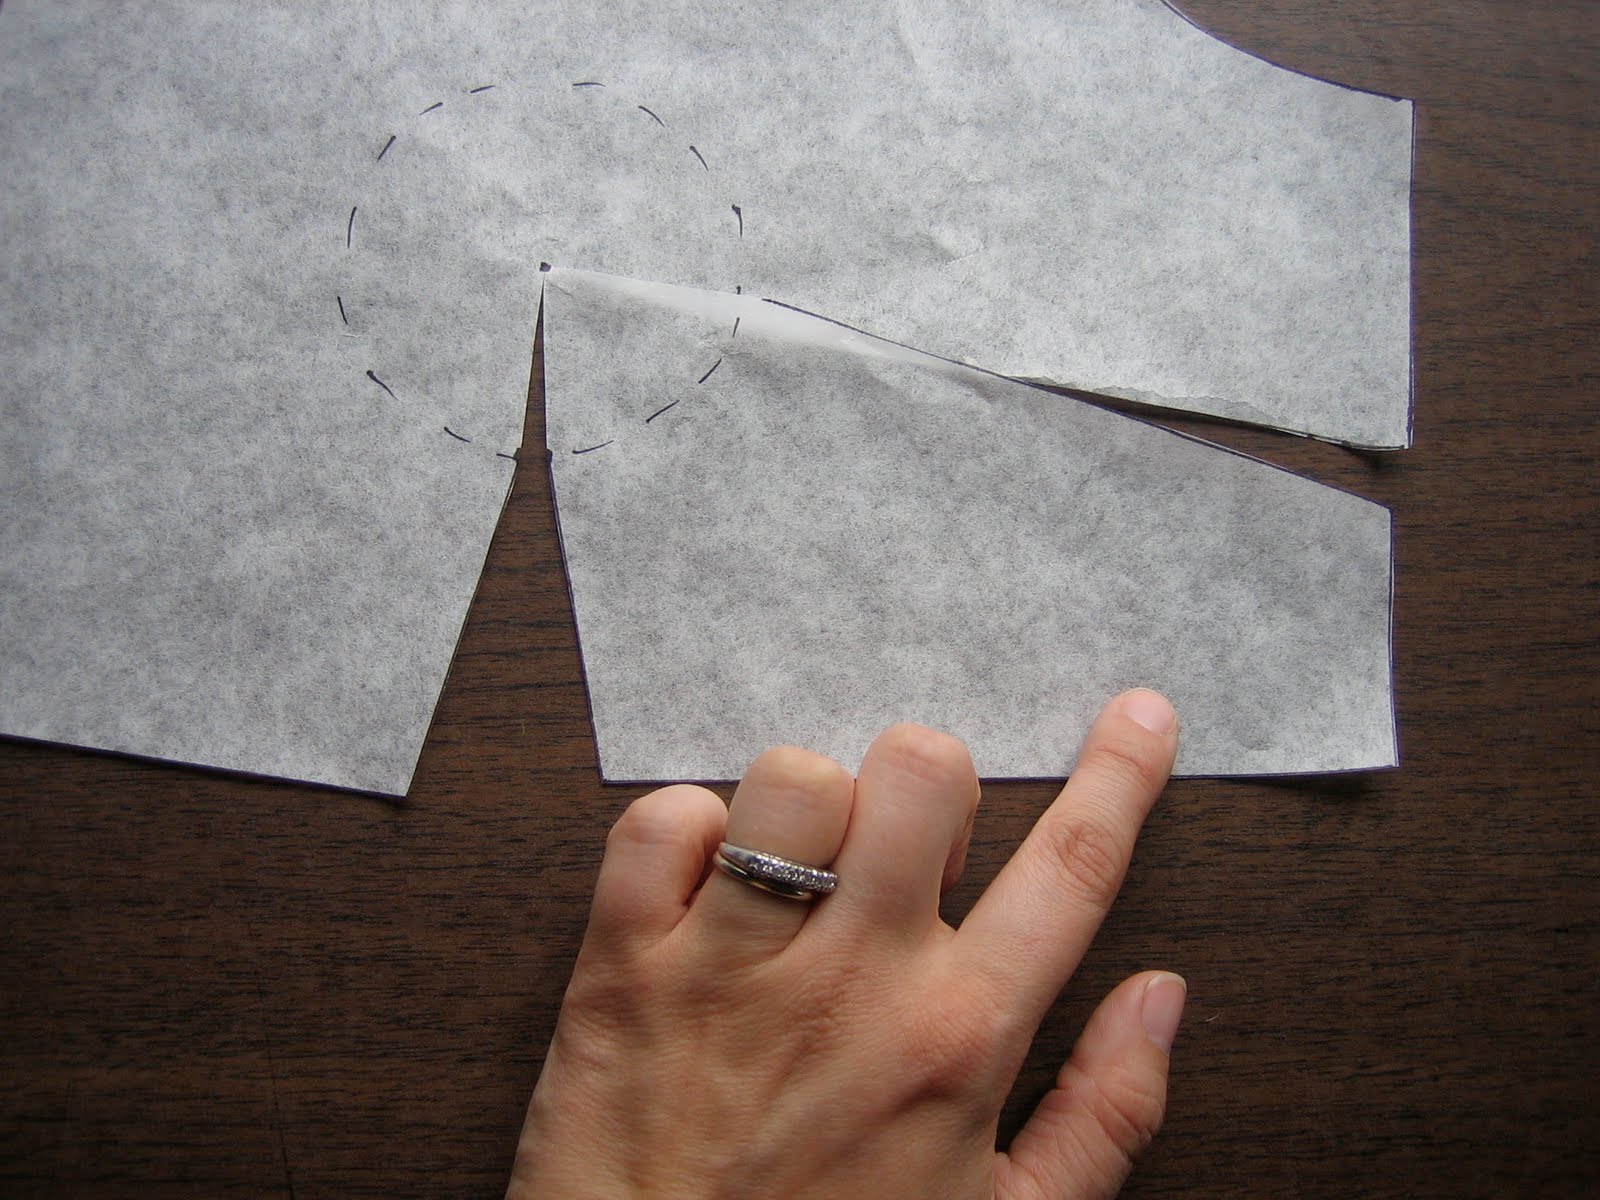

Moving a Dart

Although slopers have a shoulder dart on the bodice back, few garments do.  So what do we do with the shoulder dart?  Often, the solution is to move it to a place, like the neckline, where it will eventually be cut off.  That's what I'll do here.  But you can use this same basic technique to move any dart, for construction or design reasons.

Again, we'll be using the slash-and-spread method, which means we'll be pivoting a piece of our pattern around a tiny paper hinge.  On the bodice front, you use the bust point as your pivot point, but there's no equally obvious point on the bodice back.  So before we can slash and spread, we need to establish and mark the pivot point, 1 1/2 inches below the end of the shoulder dart.

Then, draw a line where you would like your new dart to form.  In this situation, the location of the new dart doesn't much matter, since I'll eventually cut it off when I lower the back neckline.  But if you're creating a design element, you'll want to put some thought into the placement and direction of your relocated dart.

This is the bodice back.  (The CB is on the right side of the picture.)  I've drawn a line down from the neckline edge, which will be my relocated dart, and I've connected that line to the pivot point I just established.  I've also drawn a line connecting the original dart to the pivot point.


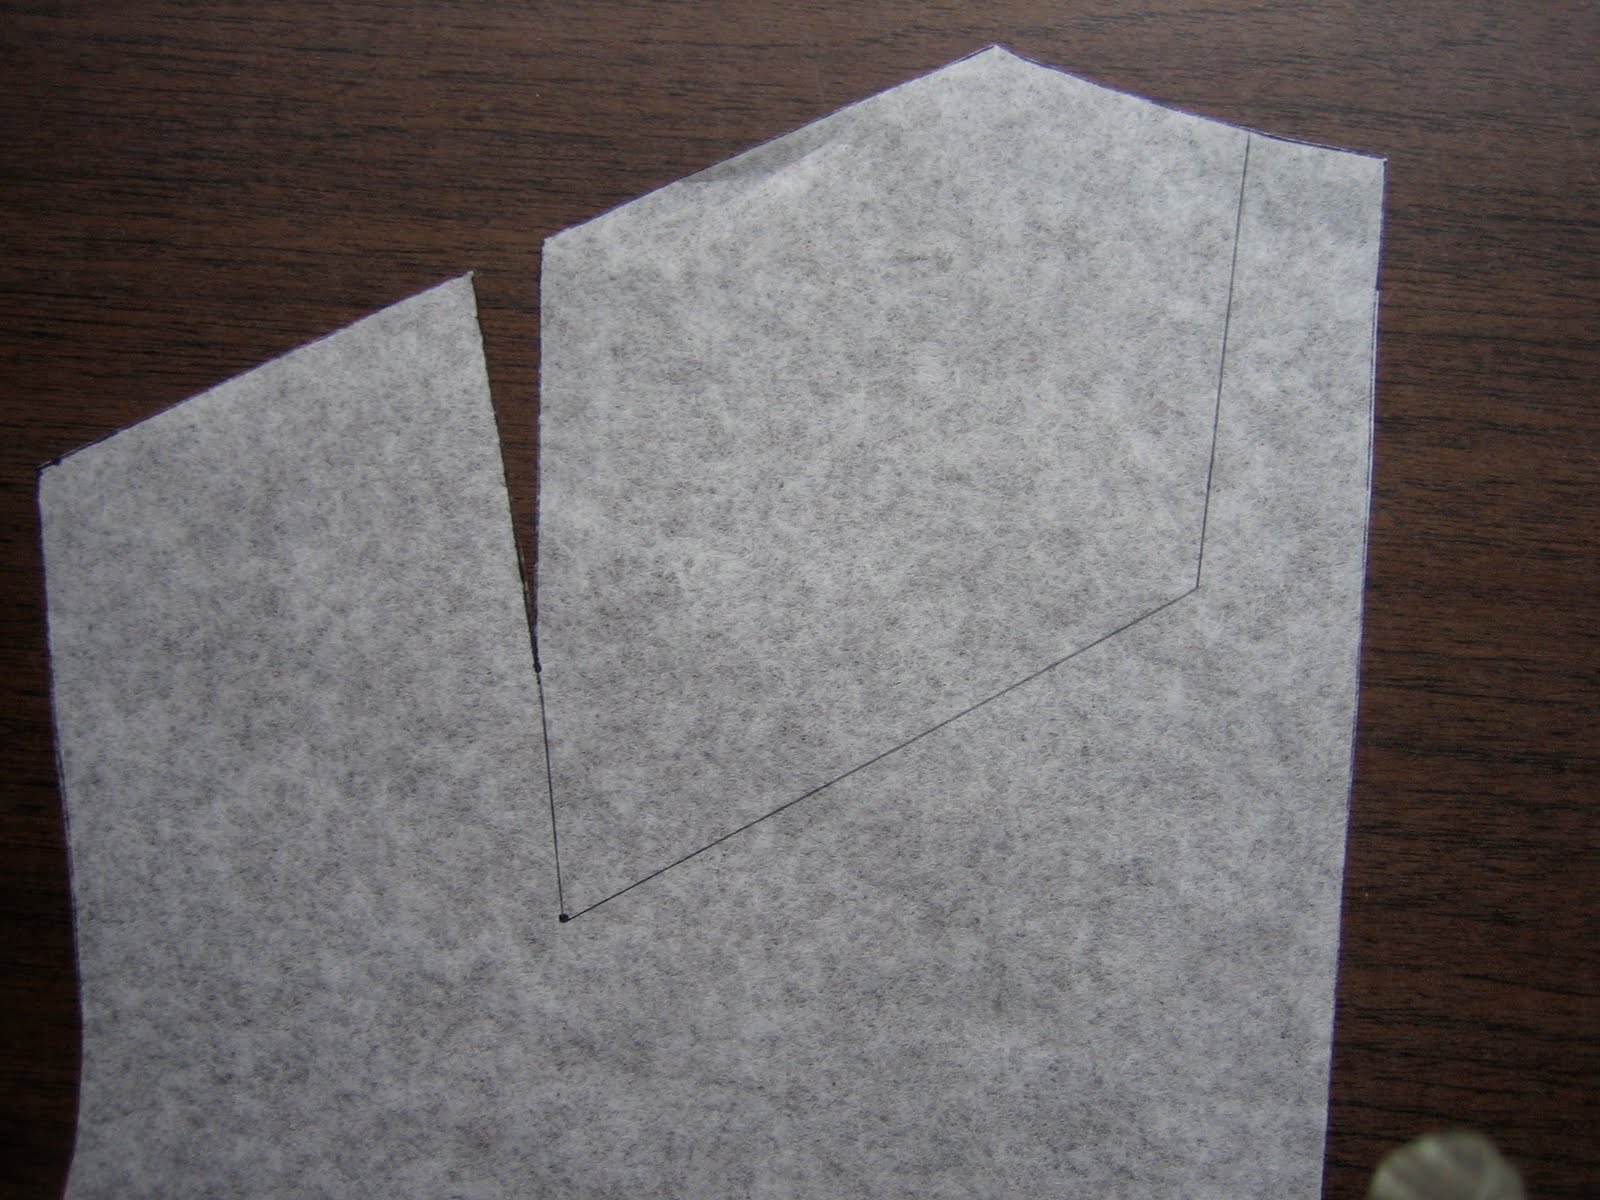
Next, cut along those lines, to but not through the pivot point, leaving a paper hinge as before.  Pivot the loose section of your pattern to close the orignial dart, keeping the pattern flat.  This will open a dart in the new location.

This is what the pattern should look like after closing the original shoulder dart.  I've taped a piece of paper behind the pattern to stabilize it.


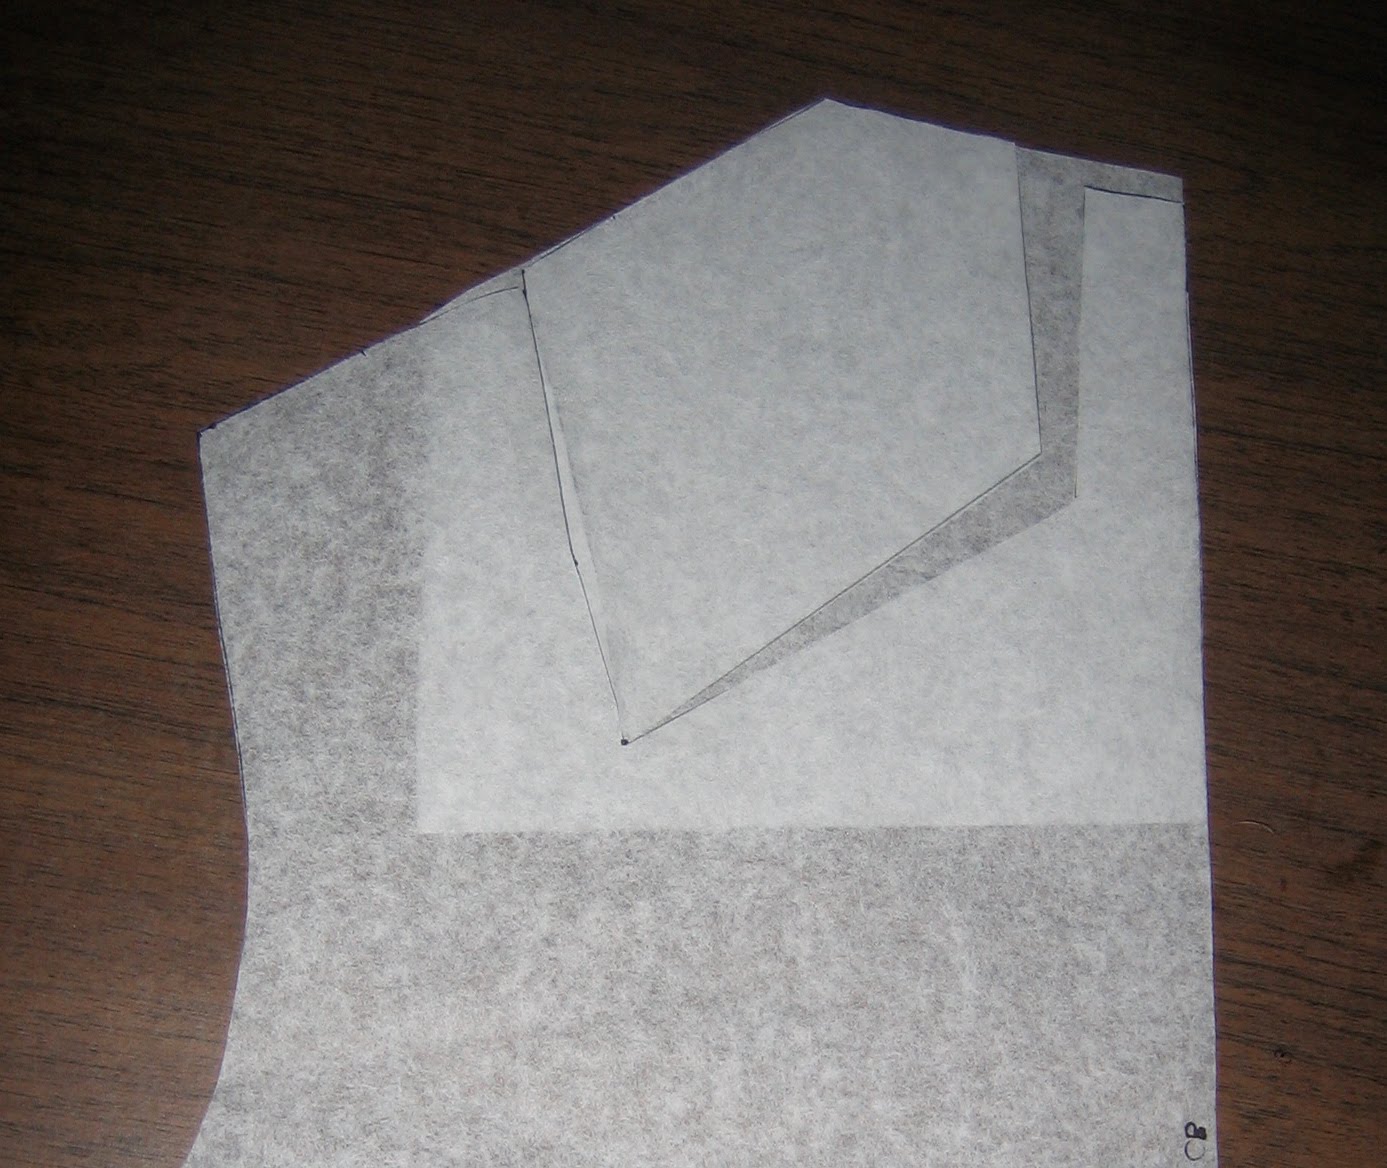
If you intended to use this dart, you would refine it now.  But since this area of my pattern will just be cut away, I'm not going to the effort to do that here.

That's all for now on moving darts!  In the next post, I'll show you how to create the surplice neckline and make adjustments to the armscye for a sleeveless bodice.

Saturday, June 5, 2010

A Much-Needed Face-Lift

Hope you all like the new look of Made By J!  This blog has been in serious need of a style overhaul for some time: I just picked some random colors when I created it, and I never intended them to be permanent.  I love the new background and template--it's much fresher and more fun.

But enough fiddling on the computer--it's time to get back to the sewing machine...

Drafting: A Midriff Yoke

In this post, I'll walk you through the process of drafting a midriff yoke like the one I used on my brunch dress.  This style can be very flattering, because it emphasizes the slimmest part of one's frame, just below the bust.  And it's very easy to draft.

First, trace your bodice front and back onto a clean piece of paper.  Then, decide how wide you want your yoke to be.  You should definitely use the bust circle on your sloper as a reference point, but it's also a good idea to use a pattern or RTW dress you like as a comparison.  Full disclosure: In my original design, I went with a 3-inch yoke, and it was terrible!  The bodice was totally disproportionate, and gave me an awful, saggy-boob look.  So I started again and made a 4-inch yoke, which was infinitely better.  The moral of the story is: designs sometimes look different when you're wearing them than they did when you're drafting them, and if I had compared my design to a dress that I liked, I might have avoided this miss-step.  I didn't take pictures of my drafting the second time around, so be aware that the pictures I'm using here are from the initial version.

Mark the width of your yoke on the front and back bodice.  Measure up from the bottom (waistline) edge.  Your line will be discontinuous across the waist-fitting dart.


Label the center front of your yoke, then cut your yoke pieces apart from the bodice and tape them together.  If you made a hash mark across the line before you cut, you'll have a notch to line up you're pieces when you sew.


Now you have two pieces--a bodice front and a front yoke--both cut on the fold.

Do the same to the back:


If you need curved darts to get a good fit, like I do, you'll need to make some additional adjustments to your bodice front.  (Curved darts aren't marked on your sloper: you draft with straight darts, then add the curves in afterward to adjust the fit).  To adjust for curved darts, increase the width of the bodice dart, and remove additional width from the upper edge of the front yoke.  I did this experimentally, by pinning my muslin to get the fit I wanted, then transferring it to my pattern pieces.  But I suppose, if you were scrupulous, you'd have noted down the curve of your darts when you originally fit your sloper, and you could just refer to that information when you were drafting the pattern.

Notice that the midriff yoke you've created here is contoured: in other words, it's not simply a straight strip of fabric.  The result of this, in the end, is a better-fitted garment, since the yoke follows your particular curves.

That's it for the midriff yoke!  In the next drafting post, I'll pick up where we left off here, and walk you though the steps of drafting a sleeveless surplice bodice.