Tuesday, July 27, 2010

Beignet-Inspired Skirt: The Ethics of a Knock-Off

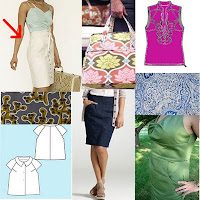
I've been making slow but steady progress on the next element of my Up North wardrobe, an ivory cotton sateen skirt, in the style of Colette Patterns' "Beignet".  I've been thinking about making a skirt like this for a while--I'd like to think I came up with the idea on my own, before I saw Colette Patterns' summer version of the skirt, which is also ivory.  But given my track record on having original ideas, I'm not so sure!

Once I got serious about this project, I found myself faced with a dilemma--to buy the "Beignet" pattern, or to draft my own.  Colette Patterns is a small, independent pattern company, and Beignet, like all its patterns, is the original design of the company's founder, Sarai Mitnick.  I try to support these sorts of businesses whenever I can, and I've heard glowingly positive things about Colette Patterns in particular.  Their designs are distinctive, their patterns are well-drafted and high-quality, and their instructions are clear and complete.

That said, Beignet is a very simple skirt to draft.  That's not to take anything away from it's design, which is original and compelling.  But structurally speaking, once you've seen it, it's pretty clear how one would draft it.  In fact, it seemed to me that altering the skirt to fit my proportions would potentially take just as much time, and yield less consistent results, than simply drafting it from scratch based on my personal sloper.  In the end, that's what I decided to do, but I'm still pretty conflicted about the decision.  So, I'm writing up the project on this blog, but only with several statements by way of a disclaimer:

1. "Beignet" is Sarai's original design.  She deserves all credit for this classic, flattering and versatile skirt.
2. Although I drafted my own version of this skirt, I won't talk about that process here.  I'll stick to discussions of the construction process and how the skirt fits into the planning of my Up North wardrobe.
3. If you like the look of this project, you should absolutely, positively buy a "Beignet" pattern from Colette Patterns!

Ok, now that I've got that all cleared up, here's an update on how the project has been going so far.  Frankly, it's been a slog.  I've got no sewing momentum right now, but I'm trying to make progress, since I have one or two more projects in my queue that are definitely for summer, and won't transition well into fall.  (This skirt is one, and my magenta ruffle-front blouse is another.)

I'm also not totally thrilled with my fabric choice for this project.  The fabric I picked is a stretch bottom-weight, but it's semi-sheer even with the lining, and you can definitely see the interfacing and the seam allowances (and sometimes, my underwear!) through from the outside.  I've also made one or two dubious construction decisions that I find myself second-guessing, and I'm dreading making all 12 buttonholes on the front.

What's more, I'm changing size right now in all sorts of weird ways (marathon training is at least partly to blame), so I keep making fitting alterations on the fly.  I'm already sewing at the tail end of the season, and while I'd usually be o.k. with stashing a project like this in my closet for a year, I'm not at all confident that this skirt will fit me next summer.

So I'm trying to soldier through and finish the skirt soon, hoping to get at least a few wearings out of it this year.  But given my frustrations with my fabric, I'm seriously reconsidering the summer jacket I had planned to make from the leftover piece.  On the one hand, a wardrobe doesn't really seem complete without some sort of "topper."  But on the other hand, it might not be worth the grief of working with this fabric.  Would a jacket like this look terrible if the darts & seam allowances showed through a bit?  Should I give it a stab, or run screaming?  What do you think?

Monday, July 26, 2010

Another Ute

I've been pretty unproductive with my sewing over the last two weeks, due in part welcome visits from family--my father and mother-in-law, on consecutive weekends--and in part to insanely hot weather, which has left me sweating so profusely that I hesitate to touch anything in our apartment, let alone fabric.

Today promises a break in the weather, and a long, lonely evening of uninterupted sewing time, so hopefully I'll be getting my mojo back soon.  But in the meantime, I wanted to write up an older project, a paisley version of the BurdaStyle Ute blouse.

I got off to a rough start with my first Ute when I cut and sewed the wrong size, but now that I've got the sizing issue figured out, I'm loving the pattern, which is actually really versatile.

For this version, I used paisley cotton voile left over from my brunch dress.  Unlined, the blouse is semi-sheer, so I need to wear it over a camisole, but I actually like that look for summer quite a bit.

For this second Ute, I once again shortened the hem and the sleeves, and omitted the cuffs.  I also re-drafted the peter-pan collar, making the shape less extreme in the front.  I like the original collar, but I also the more subtle version I drafted, which I think works better with the busy fabric on this project.

I love the collar and placket construction on this blouse, which I think yield a nicely finished result.  But on this one, I made a bit of a goof: despite my careful measuring and marking, I managed to space my buttons and buttonholes unevenly.  If you look carefully, the top two buttons are closer together than the others!  By the time I realized my mistake, I had already cut the buttonholes, so I had no choice but to wear it the way it was.  Because of the location of the mistake (at the top of the placket) and the pattern of the fabric, I think it's hardly noticeable, and it's not stopped me from wearing the blouse a bunch over the last few weeks.

I've also incorporated this blouse into my Up North Mini-Wardrobe plan.  I love how it looks paired with my denim pencil skirt, as pictured here.  And I think it will also work well with the ivory Beignet-inspired skirt I'm currently working on--more about that project soon!

Monday, July 19, 2010

A Guided Tour of My Singer Featherweight

The Featherweight is truly a product of an earlier era, and you couldn't find many of the features that make it special on a contemporary machine.  What follows here, then, is a "guided tour," as it were, of my machine, which I am still learning my way around.  Hopefully, I can share my learning process with you all, and if there are any experts out there reading this blog, please share what you know with me!

Here's a basic picture of my machine:


Based on the serial number, I know it was a later model, manufactured around 1952 in Elizabethport, NJ.  Some of the earlier, pre-war machines had elaborate scroll-work decorations on the face plate, and more old-fashioned embellishments on the machine body.  Mine has a pattern of vertical lines on the face plate and simpler, more angular embellishments.


I've already mentioned that the Featherweight is light, and its extension table folds up so it can fit into a compact travel case.  As an added bonus, this feature allows easy, unrestricted access to the bobbin case and mechanism underneath the machine.


When the first Featherweights went into production in the 30s, the zig-zag sewing machine did not exist.  So the Featherweight is a straight-stitch machine: it does one thing, and it does it well.  It also has a back-stitch, which was a new and desirable feature at the time.

As someone born and raised on zig-zag machines, the tiny aperture in the throat plate of this machine kind of blows my mind.  Intellectually, it makes sense: since the needle will never move from side to side, the aperture can be quite precise.  But it still somehow amazes me to see it.


Here's the stitch length adjuster.  The length is marked in stitches/inch, rather than an arbitrary number, like on most modern machines.  To adjust the stitch length, you move the lever up and down; when the lever is in its fully upright position, you get a back stitch.


The lever itself is so utilitarian--a threaded rod with a nut on the end--that at first I thought it might be a careless, contemporary fix.  But in fact, it's an ingenious design feature.  By moving the nut up and down on the lever, you can limit its travel, in effect "locking in" your desired stitch length.  When you raise the lever to back-stitch, the nut effectively "remembers" your earlier setting, and when you move the lever down again, it will stop in exactly the position to which it was previously set, ensuring your stitching will remain consistent.  How clever!

Even the case is well-thought out, and I'm lucky that mine is in great condition, unlike some of the ones you find on ebay.  This one has a clip on the underside of the lid, to securely hold the foot pedal, and a small tray on one side, with metal slots designed to hold about half a dozen bobbins.  It has sturdy metal latches, which make a satisfying "snap!" when you open and close them.


A machine like this, with all metal parts, will purr when it's tuned correctly--no chintzy plastic rattles!  Right now, however, my machine is a bit noisy, and based on some controlled experiments yesterday, we've isolated the feed dog alignment as the culprit.  So our tune-up will begin with that adjustment.  Till then, I'm trying not to use it--but in the meantime I plan to sit here and admire it!

Featherweight!

What do this lady and I have in common?  We're both the proud owners of sleek, portable Singer Featherweight sewing machines!

First of all, I'd like to be clear that I blame Melody for all of this.  I hadn't ever heard of or seen a Featherweight machine before she brought hers to the Southeast MI PR group.  I've been loving sewing with the group--what a great bunch of people--but traveling with my Kenmore has been a huge nuisance.  It's not intended to be portable, so it weighs a ton, and it's tricky to unscrew it from its table.  Needless to say, I don't have a case for it, or even a place to store an empty case when it's not in use.

So after this week's meet-up, I started seriously coveting a featherweight.  Even though they were originally manufactured and marketed more than 50 years ago, these machines have really stood the test of time, and remain desirable (and valuable) today.  Singer began production of the first featherweights in the 1930s, making several design improvements that set it apart from its predecessor, the Sewhandy.  The Featherweight is made almost entirely of aluminum, so it weighs just over 11 pounds.  And the machine, with all its accessories, slides into a carrying case with about the same footprint as a 6-pack of soda cans.  The featherweight was perfect for the lean years of the 1930s and 40s, when it was introduced, since it was affordable, portable, and it's back-stitch function (a new feature on home sewing machines) was ideal for darning and mending.


Today, there's a significant resale market for Featherweights (search for them on ebay and you'll see what I mean!), with some rarer models, like the 222 free-arm, selling for more than $1000.  I was lucky to find mine locally, on Craig's List, and I think I got a great deal on a machine that's in almost perfect condition.

I spent last night exploring my Featherweight, and I'm planning to post an illustrated "tour" of my machine and its features soon.  Later in the week, the Mr. and I are planning to give it a thorough tune-up, which I'll also definitely write up for the blog.

If you're curious about Featherweights, there's tons of information out there, including histories, pictures, YouTube videos, and of course, plenty of machines for sale, too.  I highly recommend Graham Forsdyke's website, singer-featherweight.com, which was the source of the advertizing images in this post, and much of the historical information, as well.  What's more, he has a copy of the orignial service manual for the Singer Featherweight, which has already proved invaluable to us as we tune up my new machine.

Thursday, July 15, 2010

Knock-Off Contest Update

Apparently I wasn't the only person who got confused about the deadline Knock-Off Contest, so the folks at PR kindly re-opened yesterday, and I was able to enter my skirt after all.  Voting begins this weekend, so please consider voting for my project :-)

Wednesday, July 14, 2010

RTFM!

Shoot!  I missed the deadline to submit my denim pencil skirt for the PR Knock-Off Contest.  I'm not quite sure how I got confused, but apparently the contest ended yesterday and voting began today :-(

I'd be lying if I said I wasn't bummed out, since I hauled it to get the project done in time to enter.  At this point, I have yet to successfully enter a PR contest (since I hadn't been a member long enough when the Formalwear contest came around).

Oh well!  At least I got a nice skirt out of the deal.  And I'll definitely enjoy checking out other people's entries.

(P.S.  If you're not familiar with the term, RTFM stands for "Read The [Expletive] Manual!")

Tuesday, July 13, 2010

Denim Pencil Skirt Completed

I was sewing until almost midnight last night, but I finally got my denim skirt finished for the PR Knock-Off Contest, and I was able to snap some photos this morning before it started raining.  I'm totally pleased with the result: the fit is good, and I was able to reproduce all of the details I liked in the inspiration piece.  Plus, this skirt bridges nicely between casual and wear-to-work, which is exactly the kind of clothing I currently need most.

Just as a reminder, here's the inspiration skirt:


And here's my version:


Design Elements:

The pleat and pocket are spot-on, and add a nice bit of interest.


The back princess seams were the only design element I changed.  Instead of having them curve to intersect the side seam, I made the curve more gradual, and brought them up to the outer corners of the waistline edge.  I think this change makes the skirt a bit more understated, and is also perhaps more flattering on someone with a larger tush.  (I did end up top-stitching them to make them lie flat.)


Back kick pleats--sassy and functional.


Construction Techniques:

I went all-out with the couture details on this skirt, which was otherwise fairly simple.  I did Hong Kong seam finishes on all the raw edges, and used a bias strip to finish the hem allowance, too.  I also added a faced waistband made out of a tiny piece of ridonkulously expensive Liberty fabric, which I trimmed with a contrast bias strip and then hand-stitched down.


I'm really proud of the way the inside of this skirt looks!  If nothing else, this project was a great opportunity to experiment with higher-end finishing techniques, in which I am largely self-taught.

So there it is, my J Crew knock-off skirt!  I'm wearing it today, as pictured, along with my paisley Ute blouse for an entirely made-by-J outfit.  And I'm sure the skirt will be seeing lots of use as part of my summer mini-wardrobe, and into the start of the school year in the fall.

An Overview of Hong Kong Seam Finishes

I'm not usually much for technique tutorials on this blog, largely because, as a relatively new seamstress, I don't know what I'm doing and make a lot of it up as I go along.  But given how much I've been talking about Hong Kong seam finishes recently, I thought I'd write up a quick overview of how they're done.  There are scads of great tutorials out there, if you'd like more detailed instructions.

I've used Hong Kong finishes twice now, once on my green dress and again on my jean skirt knock-off.  When I began that project, I was in the throes of an all-out Hong Kong finish obsession, but finishing all 10 raw edges inside that skirt has cooled my ardor somewhat.  I love the effect, and I think it was well worth the effort, but after this I'll be taking a break from Hong Kong finishes for a while.

A few quick notes about the advantages--and disadvantages--of Hong Kong finishes.  These finishes look very polished, and definitely take your garment to the next level.  They're ideally suited to heavier-weight fabrics, which would be too bulky to finish with other methods such as french seams.  Because you use a bias strip of a lightweight fabric, Hong Kong finishes also let you introduce some color contrast into your design, which I did to great effect on my jean skirt.

On the downside, Hong Kong finishes are quite time-consuming, since you have to finish each raw edge separately, which results in two finishes for every seam.  They also require extra fabric to do the binding, and because they add some bulk, they wouldn't be appropriate for use on lightweight fabrics.

Overview of a Hong Kong Finish:

First, sew your seam as you would normally, and press it open.  Cut a 1-inch wide bias strip, and pin it right sides together to one of the raw edges inside the seam.  Sew the bias strip to the seam allowance, sewing 1/4 inch from the edge.  Just to be clear, you are sewing through only the seam allowance, holding it apart from the rest of the garment.


At this point, I trim the seam I just sewed down to 1/8 inch, although none of the tutorials I've read so far mention doing this.  I think it makes the next step easier.


Then, fold the long edge of the bias strip around to the back, enclosing the raw edge of the seam allowance.  Pin and stitch in the ditch.  On my denim fabric, with navy thread, this stitching is almost invisible.


Since it will be concealed between the seam allowance and the garment, and since fabric cut on the bias is disinclined to fray, the raw edge of the bias strip doesn't need to be finished.  This is what the finished seam looks like from the back (ie. with the seam allowance flipped up):


And this is what it looks like with the seam pressed open.  (Now, of course, you need repeat for the other raw edge.)


There you have it: Hong Kong finishes in a nutshell!

Monday, July 12, 2010

Jean Skirt Knock-Off: Drafting and Construction

One of the pieces I had in mind for my Up North mini-wardrobe was a denim pencil skirt.  Currently, I have several denim skirts, but the most wearable among them has been in my wardrobe for at least 5 years and is starting to look a bit peaked.

I had been thinking about making a pencil skirt, and using a piece of denim left over from an earlier ill-conceived denim skirt project.  Looking around for a picture to use in my last post, I found this skirt from J Crew:


I recognized it immediately: the previous day, I had noticed a colleague wearing this skirt, and admired it.  So I decided to create my own version, just in time to discover the Pattern Review Designer Knock-Off contest.  Clearly, the stars had aligned and my sewing of this skirt was fated!

The skirt has a couple of nice design details, which might be difficult to see in these pictures, but are much clearer if you zoom in using the viewer on the J Crew site:
  • Front pockets and small front pleats
  • Princess seams on the back, which curve around to intersect the side-seam edge
  • two back kick pleats
All of these details were easy to draft.  For the front, I just transformed my existing darts into pleats, then added the pockets.  For the back, I decided to simplify the look of the skirt by having the curved seams end at the waistband edge, rather than the side seam.  I moved the back dart to the outside upper corner of the skirt, then used it as a basis to create the princess line, which went straight down the back of the skirt and formed the kick pleat at the bottom.

It took some serious fiddling to get the shape of this skirt right (even though I made a muslin!).  In the end, I ended up taking about an inch out of the hip and waist, and more like 4 inches out below the hipline to get a tapered, pencil shape.

Inspired by my green dress, I decided to use Hong Kong seam finishes again.  Although there are tons of great tutorials on Hong Kong finishes out there, in my next post I'll share a brief one of my own. Once again, I love the effect, but doing seam finishes on all 10 raw edges inside this skirt was tremendously time-consuming, and I'll just barely get the project done in time to photograph it for the contest!

Friday, July 9, 2010

"Up North" Mini-Wardrobe

To celebrate our first anniversary (woot!), the Mr. and I are planning a trip "up North" in August.  If you've never been there, northern Michigan might not sound that appealing, but believe me, its stunningly beautiful at this time of year.

Here's where we'll be staying, a beautiful "contemporary" bed and breakfast in the Traverse City area.  If it's anything like the pictures, we're in for a real treat!


With cool breezes, panoramic vistas, and sunset sails in mind, I can't resist the temptation to put together an "up North" mini-wardrobe for the trip.  I'm not alone in this impulse--Cidell is also at work on a travel wardrobe, although from the sound of it hers will be much more practical than mine.  But even if my wardrobe, as a whole, is a bit whimsical, I'm hoping that the individual pieces--pencil skirts and lightweight tops--will actually be pretty versatile.


Here are the pieces I have planned:
  • a "beignet"-inspired skirt in ivory cotton sateen
  • a ruffled blouse, Burda 4-2010 #105, in a lightweight magenta silk shirting
  • a summer jacket, also in ivory sateen, perhaps Burda 3-2010 #102
  • a denim pencil skirt, which I will draft, with fabric from my stash
  • a blue paisley Ute blouse (already completed)
  • the green, pleat-front dress, Butterick 5455 (already completed)
  • possibly, as the coup-de-grace, the Amy Butler weekend bag, in Ikea home dec fabric from my stash
This collection doesn't, strictly speaking, follow the rules for a wardrobe contest--although every top will go with every bottom, not all the pieces match one another, and I'm not at all sure how the jacket will work with any of the tops, since I don't have anything like it in my closet right now.  But I think, on the whole, the wardrobe has a consistent feel to it, even if it's not completely mix-and-matchable.

As of right now, I have two pieces already completed: the paisley Ute (which I'll photograph and post about soon) and the green dress.  I've got the white skirt drafted, muslined, and partially cut out.  And I'm planning to sew up the jean skirt for PR's knockoff contest.  So I'm well on my way!

Wednesday, July 7, 2010

Late-Summer Style

The summer heat is here, and it's the perfect time of year for a cool, cotton dress like Butterick 5455, which I finished just in time for the arrival of the weather.

Here it is (pre-worn and pre-wrinkled, of course) from the front and the back:


And here's a close-up of the bodice and the piping detail:


For this dress, I used a vibrant grass-green stretch cotton sateen from EmmaOneSock.  It was a bit pricey, but not much worse that the going rate for sateen in the local stores, and I adore this color.  The pattern calls for a fully lined bodice.  Since I had a summer dress in mind, I opted for a lightweight cotton lining rather than rayon, which is much cooler and more comfortable in warm weather.  I also bought an extra half-yard of the lining fabric to use for Hong Kong finishes on the unlined portion of the dress--more on that in a bit.

For the most part, I cut a straight 16, which fit well, but it took me three muslins to get a fit I was satisfied with for the bodice front.  Here are the alterations I ultimately made.
  • I lengthened the shoulder strap on the bodice front, which was inexplicably short on the original pattern and pulled the shoulder seam forward.  To do this, I just used the cutting line for the top of the shoulder strap on the size 20 and extended the size 16 armscye and neckline edge up to meet it.
  • I did a version of my "curvy girl" alteration on the lower edge of the bodice and the top edge of the waistband.  I think this alteration will become a standard for me with empire-waist styles, and I describe the process in detail here.  In short, I pinched out the excess fullness below the bust, then slashed and spread to remove it from both the bodice and the waistband pieces.  Since I only removed about 3/4 inch from each side, the overall shape of the pattern pieces didn't change drastically, but the fit was much improved.
  • I pinched out about an inch from the armscye to keep it from gaping, then used slash-and spread to redistribute that fullness to the pleats on the upper edge of the bodice.  Having done that, I refined the armscye curve, making it slightly more shallow, to get more coverage in the area where my bust is fullest.
These are pretty straightforward alterations, but the pleated bodice on this dress made things a bit more complicated.  The bodice has no darts; all of the fitting is accomplished by the pleats on the upper edge.  So when I removed fullness under the bust and from the armscye, I had to redistribute it to the pleats.  To do this, I marked an approximate bust point on the pattern piece, then slashed through each of the pleats to the bust point.  Then, I slashed the areas where I wanted to remove fullness--the armscye and the lower edge--through to the bust point.  As a result, when I removed the fullness from these areas (by overlapping the paper and taping it closed), the slashes through each of the pleats were spread open, increasing their size slightly.  Unfortunately, I forgot to take any pictures of this, so hopefully, if you're interested in making this alteration yourself, I've described it well enough to set you off on the right track.

I changed the order of the construction slightly for the bodice, so I could sew the neckline and armhole edges by machine.  I used the method I describe here, which requires you to leave the side seams open until the very end, and it worked beautifully.  Honestly, I don't know why you'd do it any other way. 

This was my first time using piping, and I really like the effect on the finished dress, even though it was somewhat time-consuming to make and apply it.   I also put a lot of effort into the finishing on this dress, which is part of why it took me so long to complete it (almost 4 full days of sewing!).  I used Hong Kong finishes for all the seams in the skirt.  I'd never done them before, but they're not at all hard, and the finished effect is fabulous.  I recommend the BurdaStyle tutorial, which is clear and well-illustrated.  I think the extra time was totally worth it: just look at the inside of this dress!  I admit, I'm almost more pleased with the inside than the outside at this point.

I love the style of this dress--it strikes me as on-trend, without being "trendy" (if that distinction makes any sense).  It's easy and comfortable to wear, and because it's cotton sateen, it dresses up or down easily, and I can wash it in the washing machine.  It's modest enough to wear to school (especially on a hot summer day) and sexy enough to wear for a special occasion.  I'd love to make another one, but I think I'd need to find just the right fabric--perhaps a bold print--to keep it from feeling redundant in my wardrobe.  And I'm already planning to adapt the pattern into a tweedy wool skirt for the fall--wouldn't those pockets be fabulous?

Tuesday, July 6, 2010

Long Time No See!

Sorry I've been a bit of an absentee on the blog lately!  I've been sewing a bunch, so now I have a nice backlog of projects to post about, if I can ever get around to taking some pictures.

I'm dying to write up a post and a pattern review for Butterick 5455, which I spent most of my 4th-of-July vacation sewing.  It took me quite a while, but I think I did a careful, high-quality job, and I'm pleased with the results.  And after a few hours of frantic finishing on Sunday, I was able to wear it to a party that night, held at a friend's posh lake-front "cabin."  It was perfect!  I promise I'll have pictures and a full write-up as soon as I can.

In the meantime, you'll have to satisfy yourselves with a brief recap of some of the (mostly) fun things I've been doing these days instead of blogging:
  • Planning a trip to northern Michigan for our anniversary in August
  • Making strawberry jam
  • Finishing a dissertation chapter
  • Meeting the cows who make our milk at a small-scale family-owned local dairy
  • Submitting an article for review (cross your fingers for me!)
  • Running my first ever half-marathon and beating my pace goal
  • Watching fireworks on a catamaran on Devil's Lake
Not too shabby!