Showing posts with label drafting. Show all posts

Tuesday, July 27, 2010

Beignet-Inspired Skirt: The Ethics of a Knock-Off

I've been making slow but steady progress on the next element of my Up North wardrobe, an ivory cotton sateen skirt, in the style of Colette Patterns' "Beignet".  I've been thinking about making a skirt like this for a while--I'd like to think I came up with the idea on my own, before I saw Colette Patterns' summer version of the skirt, which is also ivory.  But given my track record on having original ideas, I'm not so sure!

Once I got serious about this project, I found myself faced with a dilemma--to buy the "Beignet" pattern, or to draft my own.  Colette Patterns is a small, independent pattern company, and Beignet, like all its patterns, is the original design of the company's founder, Sarai Mitnick.  I try to support these sorts of businesses whenever I can, and I've heard glowingly positive things about Colette Patterns in particular.  Their designs are distinctive, their patterns are well-drafted and high-quality, and their instructions are clear and complete.

That said, Beignet is a very simple skirt to draft.  That's not to take anything away from it's design, which is original and compelling.  But structurally speaking, once you've seen it, it's pretty clear how one would draft it.  In fact, it seemed to me that altering the skirt to fit my proportions would potentially take just as much time, and yield less consistent results, than simply drafting it from scratch based on my personal sloper.  In the end, that's what I decided to do, but I'm still pretty conflicted about the decision.  So, I'm writing up the project on this blog, but only with several statements by way of a disclaimer:

1. "Beignet" is Sarai's original design.  She deserves all credit for this classic, flattering and versatile skirt.
2. Although I drafted my own version of this skirt, I won't talk about that process here.  I'll stick to discussions of the construction process and how the skirt fits into the planning of my Up North wardrobe.
3. If you like the look of this project, you should absolutely, positively buy a "Beignet" pattern from Colette Patterns!

Ok, now that I've got that all cleared up, here's an update on how the project has been going so far.  Frankly, it's been a slog.  I've got no sewing momentum right now, but I'm trying to make progress, since I have one or two more projects in my queue that are definitely for summer, and won't transition well into fall.  (This skirt is one, and my magenta ruffle-front blouse is another.)

I'm also not totally thrilled with my fabric choice for this project.  The fabric I picked is a stretch bottom-weight, but it's semi-sheer even with the lining, and you can definitely see the interfacing and the seam allowances (and sometimes, my underwear!) through from the outside.  I've also made one or two dubious construction decisions that I find myself second-guessing, and I'm dreading making all 12 buttonholes on the front.

What's more, I'm changing size right now in all sorts of weird ways (marathon training is at least partly to blame), so I keep making fitting alterations on the fly.  I'm already sewing at the tail end of the season, and while I'd usually be o.k. with stashing a project like this in my closet for a year, I'm not at all confident that this skirt will fit me next summer.

So I'm trying to soldier through and finish the skirt soon, hoping to get at least a few wearings out of it this year.  But given my frustrations with my fabric, I'm seriously reconsidering the summer jacket I had planned to make from the leftover piece.  On the one hand, a wardrobe doesn't really seem complete without some sort of "topper."  But on the other hand, it might not be worth the grief of working with this fabric.  Would a jacket like this look terrible if the darts & seam allowances showed through a bit?  Should I give it a stab, or run screaming?  What do you think?

Tuesday, July 13, 2010

Denim Pencil Skirt Completed

I was sewing until almost midnight last night, but I finally got my denim skirt finished for the PR Knock-Off Contest, and I was able to snap some photos this morning before it started raining.  I'm totally pleased with the result: the fit is good, and I was able to reproduce all of the details I liked in the inspiration piece.  Plus, this skirt bridges nicely between casual and wear-to-work, which is exactly the kind of clothing I currently need most.

Just as a reminder, here's the inspiration skirt:


And here's my version:


Design Elements:

The pleat and pocket are spot-on, and add a nice bit of interest.


The back princess seams were the only design element I changed.  Instead of having them curve to intersect the side seam, I made the curve more gradual, and brought them up to the outer corners of the waistline edge.  I think this change makes the skirt a bit more understated, and is also perhaps more flattering on someone with a larger tush.  (I did end up top-stitching them to make them lie flat.)


Back kick pleats--sassy and functional.


Construction Techniques:

I went all-out with the couture details on this skirt, which was otherwise fairly simple.  I did Hong Kong seam finishes on all the raw edges, and used a bias strip to finish the hem allowance, too.  I also added a faced waistband made out of a tiny piece of ridonkulously expensive Liberty fabric, which I trimmed with a contrast bias strip and then hand-stitched down.


I'm really proud of the way the inside of this skirt looks!  If nothing else, this project was a great opportunity to experiment with higher-end finishing techniques, in which I am largely self-taught.

So there it is, my J Crew knock-off skirt!  I'm wearing it today, as pictured, along with my paisley Ute blouse for an entirely made-by-J outfit.  And I'm sure the skirt will be seeing lots of use as part of my summer mini-wardrobe, and into the start of the school year in the fall.

Monday, July 12, 2010

Jean Skirt Knock-Off: Drafting and Construction

One of the pieces I had in mind for my Up North mini-wardrobe was a denim pencil skirt.  Currently, I have several denim skirts, but the most wearable among them has been in my wardrobe for at least 5 years and is starting to look a bit peaked.

I had been thinking about making a pencil skirt, and using a piece of denim left over from an earlier ill-conceived denim skirt project.  Looking around for a picture to use in my last post, I found this skirt from J Crew:


I recognized it immediately: the previous day, I had noticed a colleague wearing this skirt, and admired it.  So I decided to create my own version, just in time to discover the Pattern Review Designer Knock-Off contest.  Clearly, the stars had aligned and my sewing of this skirt was fated!

The skirt has a couple of nice design details, which might be difficult to see in these pictures, but are much clearer if you zoom in using the viewer on the J Crew site:
  • Front pockets and small front pleats
  • Princess seams on the back, which curve around to intersect the side-seam edge
  • two back kick pleats
All of these details were easy to draft.  For the front, I just transformed my existing darts into pleats, then added the pockets.  For the back, I decided to simplify the look of the skirt by having the curved seams end at the waistband edge, rather than the side seam.  I moved the back dart to the outside upper corner of the skirt, then used it as a basis to create the princess line, which went straight down the back of the skirt and formed the kick pleat at the bottom.

It took some serious fiddling to get the shape of this skirt right (even though I made a muslin!).  In the end, I ended up taking about an inch out of the hip and waist, and more like 4 inches out below the hipline to get a tapered, pencil shape.

Inspired by my green dress, I decided to use Hong Kong seam finishes again.  Although there are tons of great tutorials on Hong Kong finishes out there, in my next post I'll share a brief one of my own. Once again, I love the effect, but doing seam finishes on all 10 raw edges inside this skirt was tremendously time-consuming, and I'll just barely get the project done in time to photograph it for the contest!

Wednesday, June 9, 2010

Drafting: Moving Darts

This tutorial picks up where my midriff yoke tutorial leaves off: In the images you see here, I've already removed the lower portion of the bodice to form the yoke.  The next step, before we actually create the surplice neckline, will be to combine and eliminate some of the darts in the bodice.  So in this tutorial, I'll show you how to move a dart using the slash-and-spread method.  Although I'm working on my brunch dress bodice here, the steps I'll describe apply to many other situations where you would move or combine darts.


Combining Two Darts into One
 
For a bodice of this style, it doesn't make much sense to have a bust dart, so we need to combine the bust dart with the waist-fitting dart.  When we're done, the bodice front will have one single dart that accomplishes the same fitting as the two darts we started with.

First, cut through the center of the bust dart, cutting almost to but not through the bust point.  Do the same for the waist dart.  The bottom corner of the bodice piece will now be connected only by a tiny paper hinge at the bust point, and should be able to pivot freely.  (If it doesn't, you need to cut further.)


Pivot the piece so that the edges of the bust dart meet at the side seam, and tape it closed, making sure your paper lies flat with no wrinkles or hitches.


The edges of your remaining dart will be slightly uneven, so trace straight lines from the bottom corners to the bust point to form new, straight dart legs.  (As a rule of thumb, when a bodice has only one dart, it extends all the way to the bust point.  When it has two darts, the points of those darts fall somewhere in the outer third of the bust circle.)


Moving a Dart

Although slopers have a shoulder dart on the bodice back, few garments do.  So what do we do with the shoulder dart?  Often, the solution is to move it to a place, like the neckline, where it will eventually be cut off.  That's what I'll do here.  But you can use this same basic technique to move any dart, for construction or design reasons.

Again, we'll be using the slash-and-spread method, which means we'll be pivoting a piece of our pattern around a tiny paper hinge.  On the bodice front, you use the bust point as your pivot point, but there's no equally obvious point on the bodice back.  So before we can slash and spread, we need to establish and mark the pivot point, 1 1/2 inches below the end of the shoulder dart.

Then, draw a line where you would like your new dart to form.  In this situation, the location of the new dart doesn't much matter, since I'll eventually cut it off when I lower the back neckline.  But if you're creating a design element, you'll want to put some thought into the placement and direction of your relocated dart.

This is the bodice back.  (The CB is on the right side of the picture.)  I've drawn a line down from the neckline edge, which will be my relocated dart, and I've connected that line to the pivot point I just established.  I've also drawn a line connecting the original dart to the pivot point.


Next, cut along those lines, to but not through the pivot point, leaving a paper hinge as before.  Pivot the loose section of your pattern to close the orignial dart, keeping the pattern flat.  This will open a dart in the new location.

This is what the pattern should look like after closing the original shoulder dart.  I've taped a piece of paper behind the pattern to stabilize it.


If you intended to use this dart, you would refine it now.  But since this area of my pattern will just be cut away, I'm not going to the effort to do that here.

That's all for now on moving darts!  In the next post, I'll show you how to create the surplice neckline and make adjustments to the armscye for a sleeveless bodice.

Saturday, June 5, 2010

Drafting: A Midriff Yoke

In this post, I'll walk you through the process of drafting a midriff yoke like the one I used on my brunch dress.  This style can be very flattering, because it emphasizes the slimmest part of one's frame, just below the bust.  And it's very easy to draft.

First, trace your bodice front and back onto a clean piece of paper.  Then, decide how wide you want your yoke to be.  You should definitely use the bust circle on your sloper as a reference point, but it's also a good idea to use a pattern or RTW dress you like as a comparison.  Full disclosure: In my original design, I went with a 3-inch yoke, and it was terrible!  The bodice was totally disproportionate, and gave me an awful, saggy-boob look.  So I started again and made a 4-inch yoke, which was infinitely better.  The moral of the story is: designs sometimes look different when you're wearing them than they did when you're drafting them, and if I had compared my design to a dress that I liked, I might have avoided this miss-step.  I didn't take pictures of my drafting the second time around, so be aware that the pictures I'm using here are from the initial version.

Mark the width of your yoke on the front and back bodice.  Measure up from the bottom (waistline) edge.  Your line will be discontinuous across the waist-fitting dart.


Label the center front of your yoke, then cut your yoke pieces apart from the bodice and tape them together.  If you made a hash mark across the line before you cut, you'll have a notch to line up you're pieces when you sew.


Now you have two pieces--a bodice front and a front yoke--both cut on the fold.

Do the same to the back:


If you need curved darts to get a good fit, like I do, you'll need to make some additional adjustments to your bodice front.  (Curved darts aren't marked on your sloper: you draft with straight darts, then add the curves in afterward to adjust the fit).  To adjust for curved darts, increase the width of the bodice dart, and remove additional width from the upper edge of the front yoke.  I did this experimentally, by pinning my muslin to get the fit I wanted, then transferring it to my pattern pieces.  But I suppose, if you were scrupulous, you'd have noted down the curve of your darts when you originally fit your sloper, and you could just refer to that information when you were drafting the pattern.

Notice that the midriff yoke you've created here is contoured: in other words, it's not simply a straight strip of fabric.  The result of this, in the end, is a better-fitted garment, since the yoke follows your particular curves.

That's it for the midriff yoke!  In the next drafting post, I'll pick up where we left off here, and walk you though the steps of drafting a sleeveless surplice bodice.

Saturday, May 22, 2010

Brunch Dress Finished

Here's the brunch dress, which I actually like even more than the WGD.  It's simple and comfortable, and certainly more versatile than the fancier dress.


Here's my fabric layout, which ran diagonally the entire length of our living room!  I bought enough fabric to cut the skirt on the bias, but I decided, for simplicity's sake, to cut it on the straight grain.  Now, I kind of regret that decision, since the skirt blends in to the waistband more than I might like, and I think the bias-cut skirt would have given the whole thing a bit more drama.  But as a trade-off, I have enough fabric left over to make another BurdaStyle Ute blouse, which is turning out to be a great wardrobe-builder, and I know the blue paisley will work well in my spring/summer wardrobe.

The dress itself is printed cotton (I can't remember now if it's voile or lawn), and I lined it with white pima cotton lawn.  The lining fabric was definitely an extravagant purchase--it cost more than the fashion fabric!  But it was really and truly what I wanted, and it feels so luxurious when you're wearing it!  I decided to line, rather than underline, because I love the look and feel of a fully lined dress, and both fabrics were so light-weight, I didn't worry about bulkiness.  I both lined and underlined the waistband, to give it extra stability, since the fashion fabric was so delicate, and I think that was a smart choice.

Initially, I had some trouble with the bust-fitting for this dress, but the changes I made to the pattern had exactly the desired effect: the waistband fits close to my body under the bust, giving the dress a flattering shape.   I'm really pleased with the results, which you can sort of see here.  (It's also just a nice picture!)


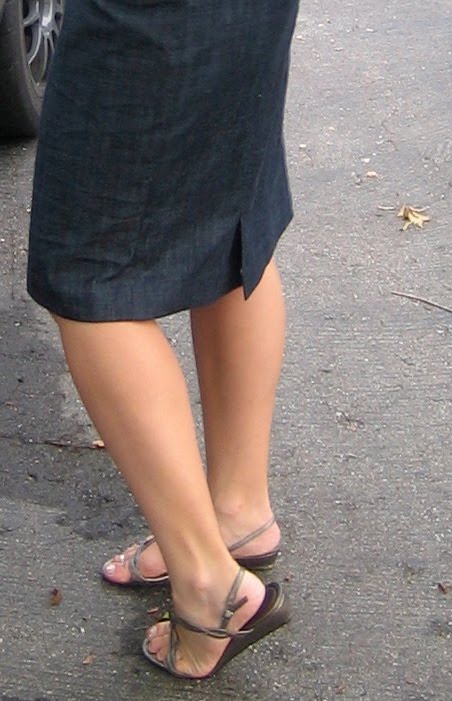
In these pictures, I've accessorized the dress as I probably will for Angela's wedding brunch, with metalic strappy heels (because everything looks better with 3-inch heels) and my beloved-but-underutilized, paisley-embossed Hobo clutch, which I carried the day of my own wedding.  (My unhealthy obsession with Hobo bags is certainly the subject of another post!)  But the dress also works well in my casual wardrobe, paired with my new navy wedges and my favorite summer jacket.


Seriously versatile dress, right?  Want your own?  Well, stay tuned, because over the next week or so, I'll be writing up a series of posts describing how to draft this dress from a personal sloper or basic dress pattern.

Friday, May 21, 2010

Draping vs. Flat-Pattern: A Meditation

Last night, I attended part of an introductory seminar on draping.  (Unfortunately, I ended up having to leave early.)  At this point, I've done a fair bit of flat-pattern drafting, but no draping, so here are my admittedly uninformed thoughts on the two methods.

Clearly, draping is sexier.  I mean, come on, it's just cool.  Draping a garment on a dress-form totally makes you look like a slick fashion designer.  Beyond the coolness factor, it also seems that draping gives you more control over your design than flat-pattern drafting.  Because you're manipulating the fabric on the form, you can evaluate things like balance and dart placement as you go, rather than waiting till you prove your pattern in muslin to see whether you like the results.  That seems like a real advantage to me, especially with more complicated designs.

That said, draping seems just as inefficient as flat-pattern drafting: in both cases, you have to create a design, copy or transfer your finished pattern pieces to paper, then prove the pattern in muslin and make adjustments from there.

And it also seems to me that draping has some real disadvantages for the home sewer.  First of all, the dress-form seems like a real limiting factor.  A good one is expensive, not to mention difficult to store.  And, unless you have a custom form created to match your specific body, the fit of your garment is always going to be an approximation.  Depending on how wonky your own personal shape is, you might or might not be able to find a form that matched your dimensions well.  And, having bought that form, god help you if you change size or shape appreciably any time in the next ten years or so!

So, I could be way of base here, but this is the impression I got: Draping is cool, but it's much more useful if you're doing Fashion Design, rather than sewing for yourself.  If you're a Designer, you'll want the added control and flexibility that draping on a form will give you in creating your designs.  And you'll probably also be creating prototypes, rather than garments designed to be worn by a particular person with his or her own unique shape (to my mind, runway models don't count).  But if you're sewing for yourself, you'll probably be needing more pencil skirts than pleated evening gowns, and you'll want them to fit you impeccably.  You also might find yourself unwilling to integrate an expensive, person-sized inanimate object into your already cramped apartment.

So at this point I'd say that, if you want to become a Fashion Designer, buy yourself a form and get draping!  But if your goals are modest and your resources are limited, like mine are, flat-pattern drafting is way to go.

What do you think?

Sunday, May 16, 2010

Drafting: A Convertible Collar

Here are some instructions for drafting a convertible collar--I made this one to complete the pattern for my Friday Frock, a shirt-dress from Bernina that's missing the collar piece.

Just a quick reminder, for anyone who isn't a regular reader of this blog.  I use Norma Hollen's book Pattern Making by the Flat Pattern Method as a reference for all of my drafting, and I want to credit her appropriately.  If you're interested in drafting, her book is an excellent resource.

Here's the definition of a "convertible collar": Unlike a regular, or "full-roll" collar, a convertible collar is designed to lie nicely if the collar is left open, and not buttoned all the way to the top.  To accommodate this, the neckline edge of the convertible collar is angled slightly, so it matches the curve of the shirt's neckline edge.  Since women's collared shirts are rarely buttoned to the top, when we think about a "shirt collar," what we usually have in mind is a convertible collar.

To begin, we'll draft a full-roll collar, which is ridiculously easy.  Then we'll modify it to create the convertible collar.

First, measure the neckline edge of your garment.  (I'm holding my tape measure on it's side so it will go around the curve better and give me a more accurate measurement.)  Here, I just used the Bernina pattern before I added the seam allowances.  My neckline edge measured 7.5 inches.  Really that's only half of the length, since the yoke piece is cut on the fold.  But since the collar will also be cut on the fold, that's exactly what I want. 

Then, draw a rectangle that is the length of your neckline edge measurement (here 7.5 inches) and 3 inches wide.  Measure the distance between the Center Back and your shoulder seam, and mark it on your collar.  To create the point of your collar, extend one of the long edges of that rectangle by about an inch (more or less, depending on the pointiness of your desired collar), and draw a diagonal line connecting it to the corner of the shorter edge.  That's it!  That's your full-roll collar.  In this picture, the lower (shorter) edge is the neckline edge, where you attach the collar to the shirt, and the left side is the center back, cut on the fold.

Now, to make the convertible collar, we want to create a slight angle in the neckline edge of our collar.  To do this, measure 3/4 inches up from the lower right-hand corner, along the diagonal edge of the collar.  Then draw a line from this point to your shoulder seam mark.  The lower edge of your collar should now be angled slightly upward.  As a consequence, it will also be slightly longer, so you'll need to adjust it.  To do so, measure your new, angled neckline edge, and mark your desired length (in this case, remember, it was 7.5 inches).  Shorten your collar by re-drawing the diagonal edge, beginning from the point you just marked and running parallel to the original line.

So, here's what your finished convertible collar should look like:


Of course, you still need to add seam allowances.  And remember, the collar piece we've drafted gets cut on the fold, and you need to cut two of them: an upper collar and an under-collar.

Frock by Friday: I'm In

I recently discovered the blog Grosgrain and the "Frock by Friday" series.  Basically, the idea is for readers to join in and sew a dress together by the end of the week.  The first frock was Elaine's Coffee Date Dress.  I've already made one myself, and unfortunately, it was in the days before I understood much of anything about fit or fabric choice, so it's not really wear-able, although it is still hanging in my closet.

The next frock, which is a free download from Bernina, is super-cute: a summer shirt-dress that would be perfect for my upcoming beach trip.  So I'm in!


Here's the fabric I bought yesterday for the project: a lightweight textured cotton with an orange stripe and solid orange for the contrast pieces on the sleeve, collar, placket, and belt.  (Sorry about the wrinkles--this fabric is straight from the drier.)  And how cute are these buttons!


Unfortunately, the pattern is missing the collar piece.  (There was some debate about this in the comments, but I'm pretty convinced now that it's the collar, and not the sleeve, that's missing.)  So I'll be drafting my own collar, and I'll write up a tutorial to share with other Friday-Frockers as soon as I'm done.

Sunday, May 9, 2010

Curvy Girls Need Curvy Darts

I finally finished a draft of my dissertation chapter yesterday, so hurrah, I have a bit of time and brain-power for sewing again!  I know I owe you pics of the WGD, but we keep having lousy weather on the weekends.  (My friend Thom, who just bought a convertible, says: "What do you call the first sunny day after two days of rain?  Monday!")  So you'll just have to wait for mother nature to accommodate a photo-shoot.

In the meantime, I've been working on a muslin of my brunch dress.  My first draft of the bodice was all wrong--so wrong, in fact, that I can't actually post photos online.  For my second attempt, I increased the width of the waistband from 3 to 4 inches, which yielded a more balanced shape, a more tasteful neckline, and less of the unfortunate droopy look that characterized the first version.

I still wasn't thrilled with the fit, though.  The back was great, and the waist measurement was correct at my natural waist, but the front still seemed kind of baggy under the bust.  Then, I had an epiphany...

...curved waistline darts!

When I originally fitted my sloper, Gwen explained that I needed to sew curved waist darts.  Instead of the traditional triangle-shaped darts, these darts have more of a tear-drop or lozenge shape.  The length of the dart is the same, and its width at the widest point is the same too.  The only thing that's different is where the fullness is released by the dart.  (If you've ever taken calculus, think about the difference between a line and a curve--the rate of change.)

Once I wrapped my mind around the idea of a curved dart, I was amazed by the difference it made in the fit of my garments.  Instead of bagging weirdly, they fitted much closer to my ribcage, which created a slimmer look overall.  Understandably, this alteration is common for (ahem) "full-figured" women.

I used curved darts to great effect in both of my sheath dresses, but I didn't even think about it when I was drafting the brunch dress.  Empire waist-lines are supposed to be flattering for curvy girls because they fit close under the bust, so I was confused when my muslin didn't.  But pinning out the equivalent of my standard curved darts made all the difference!

Here's the dress before the adjustment:


And here it is with the darts pinned--what a difference!


Here are the adjustments I made in my pattern pieces to reflect this alteration.  For the bodice, I increased the width of my bust dart one inch at the waistline seam, maintaining the same length of the original dart.  For the waistband, I removed an inch on the upper edge to match the adjustment in my dart, then tapered down to nothing at the waistline, which already fit correctly.


This made a significant difference in the shape of my front waistband piece, which is now much less curved.  (The old waistband is on top in this picture, and the new one is below.)


I'm confident enough with the changes I made in my muslin that I went ahead and cut my real fabric today.  Hopefully I'll have a dress to show you soon!  I'm also pleased, in a geeky way, that I diagnosed this fit issue and was able to make the changes I needed to fix it.  You never know, but I might be starting to get the hang of this sewing thing...

Thursday, April 22, 2010

Brunch Dress: The Planning Stages

My pattern paper is finally here, so while the bias skirt for my WGD hangs out, I can start drafting my next project, a summer dress.  This dress is also for the wedding I'll be attending in May, but unlike the satin dress, it should be much more re-wearable.

Having just had a wedding myself, I'll share my opinion that weddings are one of the few opportunities for adult, professional women (and men, if so inclined) to color-coordinate unabashedly.  Cousin Angela's "wedding colors" are shades of blue, and I've definitely jumped on the bandwagon.  The dress I'm sewing next will be for a swanky ladies-only pre-wedding brunch (with hats!)

Here's her invitation:


And here's the paisley cotton voile from Haberman's that I'll be using.  I think it has a very "brunch-with-the-ladies" vibe.


(As a died-in-the-wool academic, I can't resist pointing out the imperialist back-history of paisley, whose popularity in 19th century England reflected that nation's colonial presence in India.)

I'm planning a simple, sleeveless dress with a surplice v-neck and an A-line skirt.  Something similar to Vogue 8182, which I used to approximate my yardage.  I'm planning to use darts instead of gathers on the bodice, and a smooth waistband rather than a ruched one to get a sleeker look.

Since I'll be drafting this pattern from scratch, I figured it would be a great opportunity to write and share a series of drafting how-to's for each of the components of this dress: a midriff yoke, a surplice top, and an A-line skirt.  I'll be using my sloper as a basis, but if you don't have a sloper, you could use a pattern for a basic dress that fits you well.

So stay tuned for the first installment of the series, which will be about drafting a midriff yoke!

Tuesday, April 20, 2010

Liberty blouse--a prescient design

Liberty of London fabric has been pretty visible these days, what with the recent release of Target's line of Liberty stuff. I admit, I bought one or two of my own Liberty for Target items--a top for myself,  and a shirt for the Mister--the price was too good to pass up. But it also got me inspired to plan a sewing project with real Liberty cotton lawn, which is worlds away from the polyester used in much of Target's line.

When the Selfish Seamstress posted about the new Burda May preview, I couldn't help but notice this top:

Looks familiar, I thought. Well, it should. I own this fabric in a slightly different (I think better) color. I bought it from Emma One Sock a few weeks ago and it's still available, if anyone else is interested.


What had I planned to sew with this lovely, summery stuff? A blouse, of course! I plan to copy an RTW blouse that I love. It has small pleats all along the front and back neckline, but is still nicely fitted through the waist. I'm not sure whether I'll include a ribbon waistband, like the original, or whether I prefer a more pared-down look.

This is, of course, a drafting project, so it will have to wait 'till I've finished the dresses for the wedding I'm attending in May. (Yes, dresses, plural, because of course I need a paisley cotton sundress to wear to the ladies-only pre-wedding brunch!)  And I can't draft anything till my new pattern paper gets here. But I admit, I'm gratified to see that my fabric choice for a summer blouse wasn't way off base.