Showing posts with label dress. Show all posts

Wednesday, December 15, 2010

McCall's 6163: A diamond in the rough

As I mentioned before, one of the projects I have in the works is a version of McCall's 6163, a faux-wrap dress with raglan sleeves.  From what I understand, there was a certain amount of skepticism about this pattern on PR when it was first released, although I'm not usually very clued into these sorts of things.  You'll get no argument from me about the way the pattern is styled on the envelope: it's terrible!

 
The strange ruched 3/4 sleeves and tasseled belt leave me entirely cold.  But underneath all that silliness, I maintain that the pattern has "good bones": I love the shape created by the raglan sleeve, deep v, ruched waist, and slim skirt.  View B, without all the silly details, has serious potential.

The only major change I made to my version was to omit the collar.  Knit collars are silly, and to my mind, give the dress a distinctly down-market look.  Leaving off the collar was simple.  I just omitted the collar and band, and re-graded the sleeve front and re-graded the sleeve front and bodice front to create a smooth line.


Here's how my first version turned out--you can read my review on PR here.  I used a great lightweight career knit from Haberman's, and I think the resulting dress is totally classy, flattering, and versatile.  I've worn it a lot, although it's too lightweight for the serious winter weather we're getting right now.  For my second version, I'm using a bolder knit print that I recently scored on sale at Joann's, which I think gives it a slightly more edgy, BCBG-inspired look.

So, it turns out that McCall's 6163 is a great wardrobe builder in disguise!  On that bombshell, it's time to end.

Tuesday, December 14, 2010

Busy...but sewing

The other day, my mom says to me: "If you haven't called in a while, and you haven't updated your blog, I know you're busy with school so I don't worry."  Ah, the wisdom of mothers!  How right she is.  I have been very busy with school.  I'll be honest, being on the job market is definitely an emotional roller-coaster.  But despite all that, I have been sewing, so over the next few days I'll try my best to get the blog up to date.

So, stay tuned for posts about:
  • the Burda low-back sheath dress, 1-2010 #125, which I successfully completed in time to wear to a wedding on Thanksgiving weekend
  • my Lady Grey coat, which now has sleeves and a collar.  I'm hoping to hem this week and be working on the lining by the weekend
  • my second version of McCalls 6163, which I maintain is an awesome wardrobe-builder in disguise
  • my next project, a wool blazer.  I'm hoping I can continue to build my tailoring skills on this project, and I've asked for more tailoring books and supplies for Christmas ;-)
On a purely personal note, the Mr. is graduating from college this weekend!  Go baby go!  Returning to college as a "non-traditional" student, and balancing school with a job and adult responsibilities, is an impressive feat.  On Sunday, my man will graduate  Summa Cum Laude with his B.B.A. in Computer Information Systems, and I couldn't be more proud of him :-)

Monday, November 8, 2010

For my glamorous alter-ego


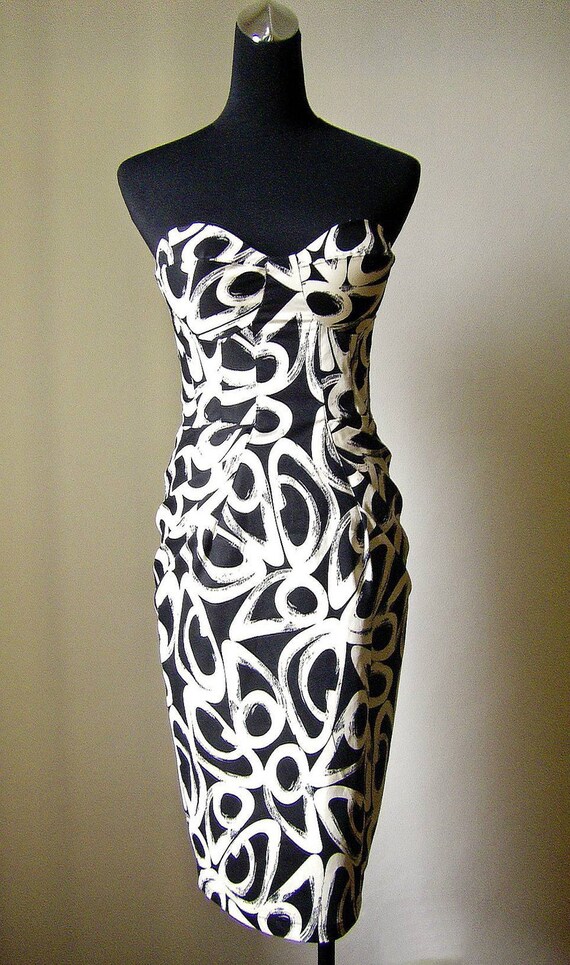
 Okay, I'm not even supposed to be blogging right now, but I can't resist sharing this with you.  The only thing I want more than this dress (by independent designer Milka Quin, for sale in her Etsy shop) would be an opportunity to wear it!

Sunday, October 31, 2010

Fitting the low-back dress

For the Burda low-back dress, I made a straight 40 for my first muslin, and the fit overall is pretty good.  The front looks great, although I need to make a bust adjustment.  The back was a bit trickier, especially since it's difficult to see the back without twisting or arching your shoulders, which changes the fit.  (Mad props to the Mr. for helping me mark my alterations after I forgot to bring my muslin to the Southeast Michigan sewing meet-up on Saturday.)

Here are the alterations I'm planning to make:

1. Fix gaping at the armhole

This is a pretty standard alteration, and I've done it several times before.  I pinched out the extra fullness at the armhole to create a second bust dart.  I'll transfer that to the flat pattern, then use slash-and spread to combine it with the original dart.


2. Create a curved seam at the center back

As drafted, the pattern is baggy in the small of my back, and too tight at the top of the back.  So I'll create a curved seam-line, adding about 5/8 of an inch more width at the top, and removing about an inch lower down.


3. Shorten the back

When I stand straight, the edges of the v-back ripple and stand away from my body.  Lynne helped me decide the best way to fix this.  I pinned out a wedge-shape section just below my shoulder blade, which tapers to nothing at the side seam.  I'll transfer this to my flat pattern and remove the wedge, which will shorten the back edge, while leaving the side seam length unchanged.


 No dilly-dallying on this project, since it needs to be done for a wedding in a few weeks, and I can't count on finding much time to sew over thanksgiving.  So hopefully, I'll have a finished dress to show you soon!

Wednesday, July 7, 2010

Late-Summer Style

The summer heat is here, and it's the perfect time of year for a cool, cotton dress like Butterick 5455, which I finished just in time for the arrival of the weather.

Here it is (pre-worn and pre-wrinkled, of course) from the front and the back:


And here's a close-up of the bodice and the piping detail:


For this dress, I used a vibrant grass-green stretch cotton sateen from EmmaOneSock.  It was a bit pricey, but not much worse that the going rate for sateen in the local stores, and I adore this color.  The pattern calls for a fully lined bodice.  Since I had a summer dress in mind, I opted for a lightweight cotton lining rather than rayon, which is much cooler and more comfortable in warm weather.  I also bought an extra half-yard of the lining fabric to use for Hong Kong finishes on the unlined portion of the dress--more on that in a bit.

For the most part, I cut a straight 16, which fit well, but it took me three muslins to get a fit I was satisfied with for the bodice front.  Here are the alterations I ultimately made.
  • I lengthened the shoulder strap on the bodice front, which was inexplicably short on the original pattern and pulled the shoulder seam forward.  To do this, I just used the cutting line for the top of the shoulder strap on the size 20 and extended the size 16 armscye and neckline edge up to meet it.
  • I did a version of my "curvy girl" alteration on the lower edge of the bodice and the top edge of the waistband.  I think this alteration will become a standard for me with empire-waist styles, and I describe the process in detail here.  In short, I pinched out the excess fullness below the bust, then slashed and spread to remove it from both the bodice and the waistband pieces.  Since I only removed about 3/4 inch from each side, the overall shape of the pattern pieces didn't change drastically, but the fit was much improved.
  • I pinched out about an inch from the armscye to keep it from gaping, then used slash-and spread to redistribute that fullness to the pleats on the upper edge of the bodice.  Having done that, I refined the armscye curve, making it slightly more shallow, to get more coverage in the area where my bust is fullest.
These are pretty straightforward alterations, but the pleated bodice on this dress made things a bit more complicated.  The bodice has no darts; all of the fitting is accomplished by the pleats on the upper edge.  So when I removed fullness under the bust and from the armscye, I had to redistribute it to the pleats.  To do this, I marked an approximate bust point on the pattern piece, then slashed through each of the pleats to the bust point.  Then, I slashed the areas where I wanted to remove fullness--the armscye and the lower edge--through to the bust point.  As a result, when I removed the fullness from these areas (by overlapping the paper and taping it closed), the slashes through each of the pleats were spread open, increasing their size slightly.  Unfortunately, I forgot to take any pictures of this, so hopefully, if you're interested in making this alteration yourself, I've described it well enough to set you off on the right track.

I changed the order of the construction slightly for the bodice, so I could sew the neckline and armhole edges by machine.  I used the method I describe here, which requires you to leave the side seams open until the very end, and it worked beautifully.  Honestly, I don't know why you'd do it any other way. 

This was my first time using piping, and I really like the effect on the finished dress, even though it was somewhat time-consuming to make and apply it.   I also put a lot of effort into the finishing on this dress, which is part of why it took me so long to complete it (almost 4 full days of sewing!).  I used Hong Kong finishes for all the seams in the skirt.  I'd never done them before, but they're not at all hard, and the finished effect is fabulous.  I recommend the BurdaStyle tutorial, which is clear and well-illustrated.  I think the extra time was totally worth it: just look at the inside of this dress!  I admit, I'm almost more pleased with the inside than the outside at this point.

I love the style of this dress--it strikes me as on-trend, without being "trendy" (if that distinction makes any sense).  It's easy and comfortable to wear, and because it's cotton sateen, it dresses up or down easily, and I can wash it in the washing machine.  It's modest enough to wear to school (especially on a hot summer day) and sexy enough to wear for a special occasion.  I'd love to make another one, but I think I'd need to find just the right fabric--perhaps a bold print--to keep it from feeling redundant in my wardrobe.  And I'm already planning to adapt the pattern into a tweedy wool skirt for the fall--wouldn't those pockets be fabulous?

Tuesday, July 6, 2010

Long Time No See!

Sorry I've been a bit of an absentee on the blog lately!  I've been sewing a bunch, so now I have a nice backlog of projects to post about, if I can ever get around to taking some pictures.

I'm dying to write up a post and a pattern review for Butterick 5455, which I spent most of my 4th-of-July vacation sewing.  It took me quite a while, but I think I did a careful, high-quality job, and I'm pleased with the results.  And after a few hours of frantic finishing on Sunday, I was able to wear it to a party that night, held at a friend's posh lake-front "cabin."  It was perfect!  I promise I'll have pictures and a full write-up as soon as I can.

In the meantime, you'll have to satisfy yourselves with a brief recap of some of the (mostly) fun things I've been doing these days instead of blogging:
  • Planning a trip to northern Michigan for our anniversary in August
  • Making strawberry jam
  • Finishing a dissertation chapter
  • Meeting the cows who make our milk at a small-scale family-owned local dairy
  • Submitting an article for review (cross your fingers for me!)
  • Running my first ever half-marathon and beating my pace goal
  • Watching fireworks on a catamaran on Devil's Lake
Not too shabby!

Saturday, May 22, 2010

Brunch Dress Finished

Here's the brunch dress, which I actually like even more than the WGD.  It's simple and comfortable, and certainly more versatile than the fancier dress.


Here's my fabric layout, which ran diagonally the entire length of our living room!  I bought enough fabric to cut the skirt on the bias, but I decided, for simplicity's sake, to cut it on the straight grain.  Now, I kind of regret that decision, since the skirt blends in to the waistband more than I might like, and I think the bias-cut skirt would have given the whole thing a bit more drama.  But as a trade-off, I have enough fabric left over to make another BurdaStyle Ute blouse, which is turning out to be a great wardrobe-builder, and I know the blue paisley will work well in my spring/summer wardrobe.

The dress itself is printed cotton (I can't remember now if it's voile or lawn), and I lined it with white pima cotton lawn.  The lining fabric was definitely an extravagant purchase--it cost more than the fashion fabric!  But it was really and truly what I wanted, and it feels so luxurious when you're wearing it!  I decided to line, rather than underline, because I love the look and feel of a fully lined dress, and both fabrics were so light-weight, I didn't worry about bulkiness.  I both lined and underlined the waistband, to give it extra stability, since the fashion fabric was so delicate, and I think that was a smart choice.

Initially, I had some trouble with the bust-fitting for this dress, but the changes I made to the pattern had exactly the desired effect: the waistband fits close to my body under the bust, giving the dress a flattering shape.   I'm really pleased with the results, which you can sort of see here.  (It's also just a nice picture!)


In these pictures, I've accessorized the dress as I probably will for Angela's wedding brunch, with metalic strappy heels (because everything looks better with 3-inch heels) and my beloved-but-underutilized, paisley-embossed Hobo clutch, which I carried the day of my own wedding.  (My unhealthy obsession with Hobo bags is certainly the subject of another post!)  But the dress also works well in my casual wardrobe, paired with my new navy wedges and my favorite summer jacket.


Seriously versatile dress, right?  Want your own?  Well, stay tuned, because over the next week or so, I'll be writing up a series of posts describing how to draft this dress from a personal sloper or basic dress pattern.

Sunday, May 16, 2010

Frock by Friday: I'm In

I recently discovered the blog Grosgrain and the "Frock by Friday" series.  Basically, the idea is for readers to join in and sew a dress together by the end of the week.  The first frock was Elaine's Coffee Date Dress.  I've already made one myself, and unfortunately, it was in the days before I understood much of anything about fit or fabric choice, so it's not really wear-able, although it is still hanging in my closet.

The next frock, which is a free download from Bernina, is super-cute: a summer shirt-dress that would be perfect for my upcoming beach trip.  So I'm in!


Here's the fabric I bought yesterday for the project: a lightweight textured cotton with an orange stripe and solid orange for the contrast pieces on the sleeve, collar, placket, and belt.  (Sorry about the wrinkles--this fabric is straight from the drier.)  And how cute are these buttons!


Unfortunately, the pattern is missing the collar piece.  (There was some debate about this in the comments, but I'm pretty convinced now that it's the collar, and not the sleeve, that's missing.)  So I'll be drafting my own collar, and I'll write up a tutorial to share with other Friday-Frockers as soon as I'm done.

Sunday, May 9, 2010

Curvy Girls Need Curvy Darts

I finally finished a draft of my dissertation chapter yesterday, so hurrah, I have a bit of time and brain-power for sewing again!  I know I owe you pics of the WGD, but we keep having lousy weather on the weekends.  (My friend Thom, who just bought a convertible, says: "What do you call the first sunny day after two days of rain?  Monday!")  So you'll just have to wait for mother nature to accommodate a photo-shoot.

In the meantime, I've been working on a muslin of my brunch dress.  My first draft of the bodice was all wrong--so wrong, in fact, that I can't actually post photos online.  For my second attempt, I increased the width of the waistband from 3 to 4 inches, which yielded a more balanced shape, a more tasteful neckline, and less of the unfortunate droopy look that characterized the first version.

I still wasn't thrilled with the fit, though.  The back was great, and the waist measurement was correct at my natural waist, but the front still seemed kind of baggy under the bust.  Then, I had an epiphany...

...curved waistline darts!

When I originally fitted my sloper, Gwen explained that I needed to sew curved waist darts.  Instead of the traditional triangle-shaped darts, these darts have more of a tear-drop or lozenge shape.  The length of the dart is the same, and its width at the widest point is the same too.  The only thing that's different is where the fullness is released by the dart.  (If you've ever taken calculus, think about the difference between a line and a curve--the rate of change.)

Once I wrapped my mind around the idea of a curved dart, I was amazed by the difference it made in the fit of my garments.  Instead of bagging weirdly, they fitted much closer to my ribcage, which created a slimmer look overall.  Understandably, this alteration is common for (ahem) "full-figured" women.

I used curved darts to great effect in both of my sheath dresses, but I didn't even think about it when I was drafting the brunch dress.  Empire waist-lines are supposed to be flattering for curvy girls because they fit close under the bust, so I was confused when my muslin didn't.  But pinning out the equivalent of my standard curved darts made all the difference!

Here's the dress before the adjustment:


And here it is with the darts pinned--what a difference!


Here are the adjustments I made in my pattern pieces to reflect this alteration.  For the bodice, I increased the width of my bust dart one inch at the waistline seam, maintaining the same length of the original dart.  For the waistband, I removed an inch on the upper edge to match the adjustment in my dart, then tapered down to nothing at the waistline, which already fit correctly.


This made a significant difference in the shape of my front waistband piece, which is now much less curved.  (The old waistband is on top in this picture, and the new one is below.)


I'm confident enough with the changes I made in my muslin that I went ahead and cut my real fabric today.  Hopefully I'll have a dress to show you soon!  I'm also pleased, in a geeky way, that I diagnosed this fit issue and was able to make the changes I needed to fix it.  You never know, but I might be starting to get the hang of this sewing thing...

Sunday, May 2, 2010

Polling the Audience

Ok guys, I need your help.

Google Analytics tells me that I there are a few of you out there.  (Some of you even live in exotic places like London and Adelaide, which I think is just too cool, but I digress.) I'm desperate for your advice!

First of all, there's the matter of the brunch dress, which has literally been keeping me up at night.  When I went back to Haberman's looking for the perfect lining, I got talked into buying some divine pima cotton lawn that cost more than my fashion fabric, but feels incredible, and it was really, in my heart-of-hearts, what I wanted.  So now, the $64,00 question is: to line, or to underline?  The paisley fabric is opaque enough that I could either.  But neither method seems perfect.  Here are the pro's and con's as I see them.

Lining:
  • Pro: I can sew and under-stitch the fabric to the lining at the neckline and armholes, which I think yields a really slick, polished finish.
  • Pro: I can do Kathleen Fasanella's slick zipper installation...almost
  • Pro: I'm a sucker for the polished effect of a fully-lined dress
  • Con: The surplice bodice poses logistical problems with attaching the waistband.  Since the dress fabric and the lining overlap at the CF and CB, I can't simply sew the waistband seam separately for each layer of fabric (ie. fashion fabric to fashion fabric and lining to lining).  But if I sandwich all 4 layers right-sides-together and sew a single seam, that doesn't leave the lining free for the zipper application.  That said, the Slapdash Sewist has faced a similar problem, if I understand her correctly, and she managed to make it work.
Underlining:
  • Pro: Underlining will stabilize my lightweight fashion fabric.  It might also be less bulky, and I'm told the finished dress will wash better.
  • Pro: It's arguably easier to sew.  I can finish all the raw edges with my serger and still get a nice, tidy look inside.
  • Con: I would probably do a rolled hem on the neckline, and I'm not sure how I feel about having a row of stitching visible there.  
  • Con: I have no idea how I would finish the armholes with the side zip.  Can you use a bias binding in this situation?  Again, that would leave me with a row of visible stitching that I'm not wild about.
So readers, I'm stumped!  I'll keep working on the drafting in the meantime, but please weigh in with your expert advice.

My next quandary is a more familiar one.  So tell me: should I buy this fabric?


It's a light-weight rayon-lycra knit from EmmaOneSock, and I'm thinking about using it for this dress from Patrones no. 284.


This dress is without a doubt one of my favorite patterns in this magazine, and I've been hunting for the perfect fabric for it for months.  I think it needs to be a print rather than a solid, and a geometric print would be best.  But it also needs to be something that will work with all the pleats and the tie collar without looking too busy.  Do you think this fabric would work?  It's vaguely similar to what the Slapdash Sewist used, and I love her version.

Just to complicate matters, do you like the abstract lines more or less than this windowpane print from Fashionista Fabrics?  It's less austere than the abstract lines, but also busier.  So I don't know what to do.


I've been close to taking the plunge and buying fabric for this dress a number of times, but I keep losing my nerve at the last second. 

So, dear readers, I place myself entirely in your hands.  Clearly, I need all the help I can get!

Thursday, April 29, 2010

Out of the Loop

Sorry, guys, I've been out of the loop for the last couple of days due to an emergent family medical situation.  (Don't worry, we're all fine!)  I should be back to blogging now, but my sewing will probably be neglected for a few more days while I catch up on real-life stuff like buying groceries, doing laundry, and finishing my chapter.

Before I left town, I made some great progress on my WGD, which is looking awesome!  All it needs now is some inside finishing and a hem.

I also want to give a giant shout-out to the ladies at the Southeast Michigan PR group.  I had a blast at the meet-up on Saturday, and got some great advice on my dress.  Hopefully, I'll still be able to make it to this week's meet-up: I've got miles of seriously boring hemming in my future!

Thursday, April 22, 2010

Brunch Dress: The Planning Stages

My pattern paper is finally here, so while the bias skirt for my WGD hangs out, I can start drafting my next project, a summer dress.  This dress is also for the wedding I'll be attending in May, but unlike the satin dress, it should be much more re-wearable.

Having just had a wedding myself, I'll share my opinion that weddings are one of the few opportunities for adult, professional women (and men, if so inclined) to color-coordinate unabashedly.  Cousin Angela's "wedding colors" are shades of blue, and I've definitely jumped on the bandwagon.  The dress I'm sewing next will be for a swanky ladies-only pre-wedding brunch (with hats!)

Here's her invitation:


And here's the paisley cotton voile from Haberman's that I'll be using.  I think it has a very "brunch-with-the-ladies" vibe.


(As a died-in-the-wool academic, I can't resist pointing out the imperialist back-history of paisley, whose popularity in 19th century England reflected that nation's colonial presence in India.)

I'm planning a simple, sleeveless dress with a surplice v-neck and an A-line skirt.  Something similar to Vogue 8182, which I used to approximate my yardage.  I'm planning to use darts instead of gathers on the bodice, and a smooth waistband rather than a ruched one to get a sleeker look.

Since I'll be drafting this pattern from scratch, I figured it would be a great opportunity to write and share a series of drafting how-to's for each of the components of this dress: a midriff yoke, a surplice top, and an A-line skirt.  I'll be using my sloper as a basis, but if you don't have a sloper, you could use a pattern for a basic dress that fits you well.

So stay tuned for the first installment of the series, which will be about drafting a midriff yoke!

Wednesday, April 21, 2010

WGD 2.0: If at first you don't succeed...

Ok, folks.  I'm chalking up my first attempt at the wedding-guest dress as a "learning experience," and starting again from scratch.

Just to remind you, this is what I'm aiming for.  The original dress, called "Retail Therapy," is sold out on ModCloth.


Overall, I think my pattern is solid, and I've only made a few small adjustments to the fit for my second attempt.  I think the main problems were fabric choice and construction.

The poly charmeuse I picked the first time around is way too light and drapey, and it doesn't really stand up to the more structured look of the dress.  Also, the fabric is really shiny, which just makes the whole thing look cheap.

For my second attempt, I ordered up mid-weight poly satin from Fabric.com, and I'm much more pleased with both the color and the hand.  The charmeuse is on the left, and the satin is on the right--look at the contrast!


Fabric choice aside, my real sins with this first attempt were in the construction.  I chose not to interface the neckline, since you could definitely see a line on the right side of the fabric where the interfacing stopped.  This was a mistake.  As a result, the stand collar is droopy, and the neckline is rippled where I sewed the bodice to the lining.  I also rushed to get the skirt on and the zipper installed, again omitting interfacing, which led to (you guessed it!) more ripply seams and the most horrible, unwearable wavy zipper ever.  It's so bad, I won't even show you a picture!

Believe me, I've learned my lesson!  This time I'm interfacing EVERYTHING.  I'm also going to be much more careful not to stretch or ease my fabric when I'm pinning or sewing on the bias.  Hopefully, the heavier fabric will help with this too--unlike the charmeuse, which was super-fluid, the satin holds its shape and stays on-grain much better.  I'm also planning to hand-baste my zipper before I sew.

So far I've cut the bodice and sewed the bodice lining (which is also cut from satin), and I'm pretty pleased with the results.  My one concern is pressing: the satin doesn't want to hold a crease, and when I press it enough to flatten out a dart, it leaves a faint, shiny mark along the edge of the folded fabric underneath (if that makes sense).  I'm thinking right now that I'm going to press it anyway, figuring nobody will notice the marks.  But I'm open to suggestions: what are the "best practices" for pressing satin?

Sunday, April 11, 2010

That awkward stage

Sigh!

My wedding-guest dress is at that awkward stage.  You know, the one where you've done enough construction to know that it's not quite right, but you haven't figured out how to fix it yet?  Ever notice that you always seem to hit that stage about an hour after you should have stopped and eaten something, or put the project down and gone to bed?

My plan is to leave it be for today and work on my jeans.  I'll tackle it with fresh eyes later in the week.

Sunday, April 4, 2010

Best. Muslin. Ever.


Yowza!

This is the muslin for my wedding-guest dress, and let me just say: I looooove it! It's a little hard to see all the details in these pictures, and since my muslin is slightly sheer, I can't show a back-view for modesty reasons. But it looks just the way I pictured it in my head, and it fits great! It will look even better with the drape of the charmeuse, but I think it looks pretty darn good in muslin. And the Mister seems to agree ;-)

I had one false-start with my bodice pattern: remember folks, if you want a surplice top to overlap by x inches at the center front, you need to add the full x inches to each side. Then, when I revised the bodice pattern, I mysteriously added 2 extra inches, probably due to my pattern-paper-shenanigans.

As I mentioned, I did some really shady slash-and-spread pattern drafting this weekend in an attempt to conserve my last bit of pattern paper. I think I'll get away with it (knock on wood), but that doesn't mean it was a good idea. Don't do this!


At this point, I've drafted everything except the skirt lining, and I've used every scrap of paper in our house. But based on this muslin, I'm feeling confident and ready to cut.

Wednesday, March 31, 2010

Projects in a holding pattern

It's April (almost!), which means that the end of the semester is coming soon, and school is getting ready to kick me in the [part of the body that would hurt when kicked]. But I've still been making uneven progress on several projects. Here's an overview:

Jeans

The jeans look great. I've done everything but finishing the waistband, and I've got my rivets, tack buttons, and belt loops ready to go. But I'm waiting for my new "made by J" sewing labels to arrive so I can sew one onto the waistband facing before topstitching it down. These jeans are an accomplishment for me, and I can't resist tooting my own horn a bit, even if no one else ever sees it. Currently, the post office is holding my labels hostage (don't get me started on the post office!), but I hope to have them in hand by the end of the day today. In the meantime, I've been reading all the posts about rivets on the Pattern Review jeans sew-along to educate myself about what lies ahead.

I plan to do a full write-up with better pictures once I get my jeans done, but here are some quick snapshots to tide you over. Sorry for the poor quality--my "resident photographer" had to study for an exam this morning!


Wedding-Guest Dress

Many months ago, I had this idea for a dress to wear to a family wedding in May. Since then, I've changed my mind several times, but I've finally decided on this design, which will be more versatile:


The original dress is sold out on Modcloth, and the pictures are no longer on the site. I'm planning to make my version very similar to this one, with a few minor adjustments: I've made the curve of the raised waistline more gradual at the center front, and I've increased the overlap of the surplice top so it will be less cleavage-tastical. (Several of the reviews mentioned needing double-sided tape--not the look I'm after for a family wedding!). I'm making it out of navy polyester charmeuse, same as the original. Why mess with a good thing?

I started drafting this dress over the weekend, and I got the front mostly done when I ran out of pattern paper. Look at this skirt pattern! This is me trying desperately to use my last scraps of paper to stabilize my pattern, which was held together only by delicate paper hinges. It looks like Frankenstein's monster!


I scored a little more paper on Monday, hopefully enough to finish the project. But I definitely need to find a more reliable paper supply.

Cotton Print Blouse

Stymied in my attempts to work on my jeans and my dress, I started in on another project in my queue--a cute cotton print blouse. I bought this cotton voile months ago, but now it's finally warm enough to think seriously about spring blouses.


I debated, and finally decided on BurdaStyle Ute:


I opted for version A, with the peter pan collar, omitting the crazy cuffs. But I also like B, with the tie collar, and I've got my eyes on it for a subsequent project.

Simple enough, right? Wrong! First of all, my computer pitched a giant fit when I tried to print the pdf file--I've never had this much trouble with a print-at-home pattern before! I had to download Acrobat to make it work.

Now, I know, a sensible person would've done a muslin of a new pattern, even if the measurements for a given size matched her body perfectly. Failing that, a sensible person would have at least basted it together to test fit before sewing time-consuming french seams. Did I do any of these sensible things? Of course not! I forged right ahead. And look at the results:


It's huge! It looks like a house dress! I know the pattern is supposed to be a slightly relaxed fit, but this is not what I was after. I think I need to take out all my beautiful french seams, press the pieces, and re-cut them 2 sizes smaller. Some pieces, like the center front and the collar, I'll have to cut again, but I'm planning on fudging the others. I bought another yard of fabric, but I still have to wash it and dry it before I can do anything else.

I'm convinced I can salvage the project, and I still love the concept, but I admit I'm a bit discouraged. I'm planning to set this project aside for a bit and wait for a second wind. It's not like I won't have enough to work on in the meantime!